Home Home Home Contact Me About Me Facebook Twitter Teachers Pay Teachers Pinterest Bloglovin Email Me
Showing posts with label organization. Show all posts

Saturday, July 23, 2016

Back-To-School Money Saving Tips for Teachers and Parents!

I've watched the shows about people who use coupons to the extreme and am in awe of their dedication and consistency.  I wish I could be that kind of money saver, but unfortunately, it just is never going to happen.  However, when it comes to back to school supplies I tap into my inner extreme couponer and start pulling out ads, finding coupons and trying to combine the coupons with the sales.  Teachers and parents spend so much on back to school supplies!  Seriously, I have a list of 22 items for my upcoming first grader and 24 items for my upcoming 3rd grader!  With that in mind I wanted to share a few of my and some of my friends favorite Back-To-School money saving tips!


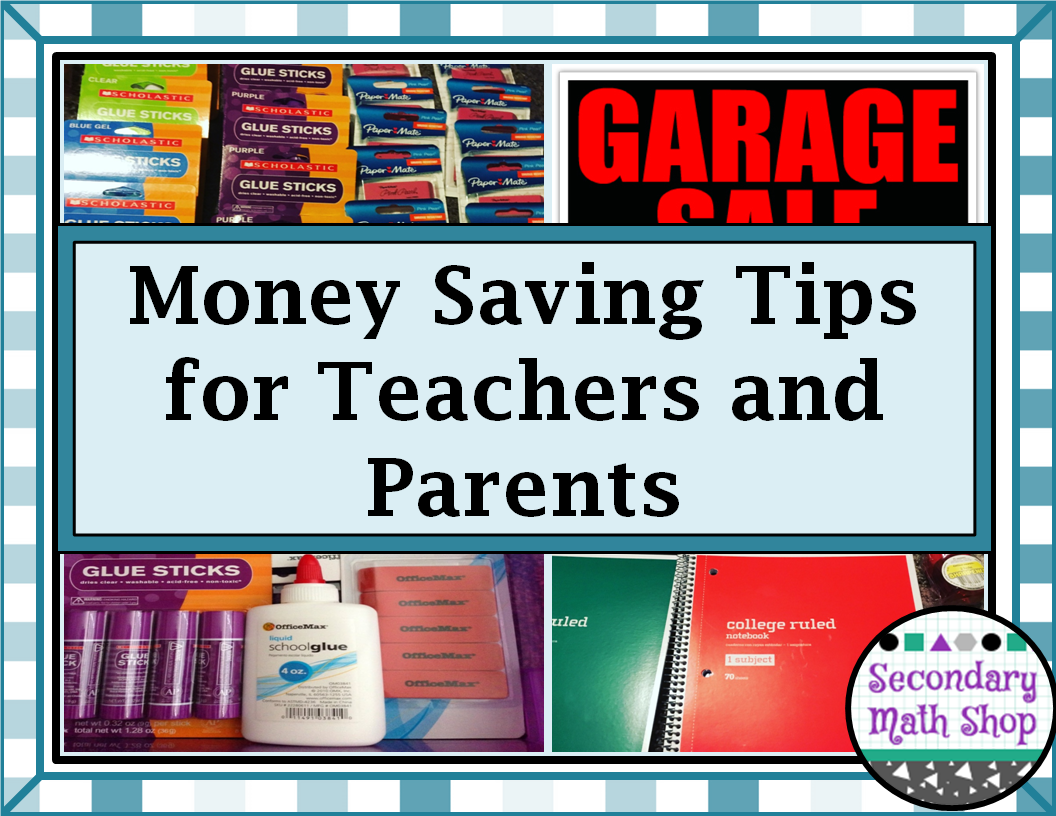
1)  Big box office supply stores start with their back to school savings in July!  I discovered this by accident a couple of years ago when I was looking up on one of their websites and happened to glance at the weekly ad and saw things for a penny, a nickle and a quarter.  I was like a penny?  No, that can't be right...but it was!  This week alone I was able to get:

*  packs of 3 glue sticks for a penny each
*  70 page notebooks for a penny each
*  packs of 3 pink erasers for a penny each
*  handheld 2 hole sharpeners for you guessed it, a penny each.

Now of course these stores have limits - usually three each but you can go back multiple times, take a friend and some even extend the limits for teachers - just ask.  Some also have a minimum purchase (usually $5) but that can easily be met by the things that are on sale for a dollar apiece that you would be buying anyway (for me this often colored paper or dry erase markers).   I already have next week outlined because they have 2-pocket folders and packs of 100 index cards for $0.01 apiece and colored pencils for $0.50 starting tomorrow! :)


2)  Jameson from Lessons with Coffee suggests going to thrift stores! "There is so much stuff there from rugs, binders, storage options and even fabric for bulletin boards at fractions of the dollar of what you would pay at the bigger stores."  I agree completely!  I have no blinds or any other window covering in my classroom so the sun is always beating in and heating up the room.  I went to a local thrift store and picked up fabric that I fashion curtains out of!  Not only does it cool
the room, but it looks amazing too!  In addition to thrift stores, you can also check out garage/yard sales especially for storage bins and other containers for holding books and supplies.

3) Use teacher discounts and rewards programs.  Multiple stores not only have special discounts for teachers but they also have rewards programs.  Barnes and Noble Bookstores has a teacher discount program as do official teacher stores like Lakeshore Learning.  The major office supply stores like Office Max, Office Depot and Staples have a special teacher rewards program where you earn money back, coupons and other deals on purchases.  Often these discounts can also be combined with coupons so double savings!

4)  Prioritize your shopping list and buy in bulk when possible.  The reality is that as much as we want everything we don't need everything.  When sitting down to figure out what you are going to buy for your classroom, your upcoming school year or for your child(ren)'s up coming school year that sometimes you have to realize that everything is just not possible.  Money is limited and some supplies are more necessary than others.  Figure out what is the most important, most crucial and what is going to have the greatest impact and purchase those things first.  Once you have figured out the most necessary things see if you can buy them in bulk.  While the bigger package is going to be more expensive it will more often than not work out to be cheaper per individual piece than if bought smaller amounts.  Also, don't be afraid to use the store/off-brand for supplies that are "consumable".  A glue stick is a glue stick regardless of what label is on it.  Construction paper is the same paper if it is a store brand or a name brand!

5)  Jamie from Miss Math Dork takes it a step further and encourages you to "Make a budget! Or else it's too easy to keep buying "one more thing". Shop in stores that have a sale going on, and check out thrift shops and yard sales for nice storage options.  I try to buy a little bit at a time all year, and keep it stored until BTS time."  Knowing what you have to spend and setting a limit will not only make you a frugal shopper but will also help you to stick to your list (and you should always make a list)!

6)  Figure out what you already have.  I cannot count the number of times that I have shopped for my classroom, bought something and then when I set-up my room in the fall I find out that not only did I already have it, but in some cases I have it it in abundance.  For example, I found a great deal on index cards, then realized that I had 20 packs stuck in a cupboard in my closet - whoops!  I recommend taking the time to make a list of what you already have. Making a list of what you already have not only keeps you from spending money that you don't need to but it also encourages you to examine what is really essential.  What you do you use a lot of (glue sticks, paper, etc.) and running out of and are there things that you thought would be so great but you never used ... or forgot about?

7)  Invest in quality versions of the reusable supplies.  While spending a little more on quality will not save you money immediately, it will in the long run.  If you know that you are going to be splitting students up into groups often, invest in some high quality totes so that you have supply boxes ready and able to go.  Since scissors are used constantly, invest in higher quality brands so that they hold up to the constant wear and tear of 100+ students using them in one
day.  Of course, still look for these to be on sale (I just got very high quality 7 - inch scissors on sale for $1 apiece that were regularly $7 each) but be willing to pay a little more for the things that are non-consumable.

I would love to hear your money saving tips!  Please share them below!


.

Tuesday, January 5, 2016

Why I Believe You Should Decorate Your Secondary Classroom (and How To Do It!)

When I first started teaching 15 years ago, I was the only female in my department and the youngest teacher to boot! Needless to say I stuck out from the rest of my department (cue the song "one of these things is not like the other...). When I made the decision to decorate my classroom it made the difference even more obvious. However, looking around my very empty, bare, beige, cinder-block classroom I felt it was very cold, very sterile and just not that welcoming so I HAD to decorate. The big question, though, was how and with what? I had no clue how to decorate a secondary classroom so that it look like a high school classroom and not an elementary one. I had no idea how to get things to stay on the walls, where to find supplies or even a vision of what I wanted to look like! I just knew that I had to do something...

It was that last part - lack of vision - that led to many mistakes and wasted money (and as a beginning teacher money is definitely not something you have a lot of)! Finally, though, after 15 years I have finally feel like I have an under control, inviting, warm, educational and cohesive design! I would like to share a few tips with you to help you avoid the follies that I made my first few years!

1) Plan the space out before you begin. All classroom are traditionally either rectangular or square in design but you don't have all of that space to work with. If your room is anything like mine you have cupboards, heating vents, boards on a certain wall, bulletin boards, computer drops and of course 33 desks! Free space is a premium and you need to use it wise. You don't want to go out and get a bunch of things and then have no wall space to display them or floor space to put them. Before I started my current classroom "decor" I laid out on paper all of the thing that I had to have that I had no control over. For example, based on where the drops were, I had to
have my computer and teacher desk in the front corner. I have a huge air-conditioner/heater that sticks out 2 feet and takes up a third of one of my walls - but it is right under a window so I couldn't have used that wall space anyway. By laying out everything that I HAD to have, I was able to recognize what space I had to work with and could move on to the next step.

2) Place physical objects that take up floor space before posters or other decor. Start by placing your desks, tables, file cabinets that have to be in your room in the place that they need to go. If you want book cases, shelves, a student resource area (i.e. pencils, paper, sharpener, etc.) then they need to go in next. There is nothing more annoying than to put up posters, only to have to move them because a book case, file cabinet, etc. needs to go in that space. Placing everything physical first also allows you to see sight lines and room flow. If you want to post homework, you need to have it in a spot where it is easily accessible and visible versus someplace that it is going to get lost or cause mass congestion.

3) Decide what you want to put on your walls before you buy or make it. Do you want to illustrate your vocabulary (check out my previous post on word walls for ideas if you need them!) and formulas? Do you need to post your objectives and I-cans in a certain place? Do you want to post a list of previous homework or a homework calendar? Do you  want to do some encouragement posters (character, effort and the like?) or words to think about? Do you need to post your rules/expectations? Do you want to leave a space open to display student work?
Do you want to use a lot of different colors or stick to more of theme? Remember, the purpose of putting stuff on your walls is to not only make your room educational and helpful, but also inviting and some place that students feel encouraged and free to learn. Also keep in mind, while you students look at the walls for an hour or so a day, you look at them for 8 hours a day, 5 days a week...

4) Shop smart and frugally. When I first started out buying posters for my classroom I just went to local teacher store and bought what caught my eye. I put tape on the back, hung them up and called it done. It never occurred to me to laminate them to make them last longer, to make them myself or to shop online. Matter of fact, when I first started teaching, the internet barely existed!!! Now, there are so many options. You can go to Amazon and get them in two days for cheaper than the teacher stores offer which is fantastic - depending on what you are looking for that is! I found that while teacher stores were great for the encouragement posters, basic concept and a small portion of middle school math skills that we use at the high school level, they did not cover what we do at the high school level. There just did not exist posters covering the higher level math that I needed. Again, since this was really before the prevalence of the internet I was left with one option - make them myself! And make them myself I did! :) I ended up making over 200 "posters" that are 8.5 by 11! (If you are interested in having them for yourself, check them out in my teacherspayteachers store.) Over time, I have also bought some from other sellers on TpT and finally found a few on Amazon as well! If you choose the route of buying digital and printing them yourself, you can get cardstock pretty inexpensively at your local craft store or some of the big box stores. Also, look into the cost of printing them on your own color printer versus paying an office supply store to do it, often times they are cheaper!

5) Take care of what you have so that it lasts beyond a school year. We live in a green-conscious world and we need to conserve resources so make yours last! While I
know that laminating something and then pitching it is not good for the environment, more often than not, when you laminate a resource, it is because you plan to keep it long term! All of my posters are laminated for two reasons. One because they last longer and two because when I put tape on the back of something that is laminated, it pulls off easily and the poster can be stored easily. I also recommend that you buy a few totes or something else hard plastic to keep them from getting bent or damaged. I tried buying on the poster folders that the local teacher store had, but they were flimsy and unless stored flat, they would eventually curve and curve the posters with them.

My room has evolved a great deal over the last 15 years from a cold, empty, beige (oh way too beige) room to something full of life, color, warmth and that is welcoming! It has been and probably always will be a work in progress but it is also something that I have found enjoyable! I hope that my tips have helped you! I would love to hear what you have done to your room or to answer any questions you might have below in the comments!

Friday, July 31, 2015

Classroom Management Tips: Secondary Level

No matter how many years you have been teaching, be it just starting your first year, starting your last year or somewhere in-between there is one necessity that never goes away - Strong, Effective Classroom Management.  I have found over my years of teaching that regardless of the class, topic or even grade really, that there are few standard practices that will always hold true.

1.  Start day one with a clear set of expectations in your head.   
Spend some time before the first day thinking about what you want your classroom environment to be like.  Do you want to establish a routine where students know that as soon as they come they get started on warm-ups (bellwork/do-nows, etc.), then homework questions, lesson etc.?  Do you want to have students hand in work to a turn-in bin, do you want to collect it or perhaps you plan to walk around during the warm-ups to check it in and conference with students.  Do you plan to give bathroom/locker/hall passes?  If so, when in the class is it acceptable to ask?  What is your acceptable use policy for technology? These (and many more!) are questions that you need to have an idea about ahead of time.  By knowing what you want your classroom environment to be like, you can devise ways to make it happen!  The less that you have clear in your head before you start, the more likely you are to lose control of your classroom.

2.  Stick to your word.  If you say that doing "x" will result in "y" consequence, then do it!  The minute you let a behavior slide once, you are done.  You will start hearing "but you let so and so get away with it...".  On the flip side, if you express to students that they will get a reward of something for completing a task (i.e. the winning team gets a candy bar tomorrow), and then don't follow through, you will lose their trust.  One very powerful way to be able to stick to your word is to talk to your students about what you expect (see #1), what they expect and devise consequences (and rewards) together that everyone can find acceptable.  Students are far more likely to "buy-in" if they feel like they had a stake in creating something in the first place.

3.  Create an environment where students feel safe to make mistakes.  Math students, especially at the secondary level, are very afraid of failure as well as getting something and therefore tend towards not trying unless they are pretty sure of success.  When students aren't trying, they aren't engaged and therefore become behavior problems.  In order to combat this I employ two very powerful strategies.  First, when I make a mistake (especially if I am at the board teaching) I acknowledge it.  I don't try to cover it, I just go with it and use it as a teachable moment.  I will often ask students if they can help me find my mistake.  I even been known to make a mistake on purpose to further this goal.  The second thing I do is to talk to my students about what it feels like when you make a mistake in other situations, how you learn from them and then we discuss how that can be applied to our classroom.  This goes a long way to showing students that getting it wrong is part of the process of learning how to get it right!

4.  Establish norms for the different situations that will arise.  
Just as knowing how your want you classroom routine structured is important to effectively managing your classroom, so is knowing how you want the different situations that occur in a classroom to run.  The first situation that you may want to consider is group work settings.  What is your plan for when students work in groups?  Do you choose the groups or do the students?  Do you have limits on group size?  Are you going to assign roles within the groups?  Do you want a single paper turned in per group or do you want all the students to complete an activity and staple their papers together as a group?  The second situation which is crucially important to have a plan for is classroom discussions. Do you call on the students or can they call on each other?  Can students opt out of answering a question or must they give it an attempt?  Are you going to keep track of participation for points or is there not a need for that?  How are students allow to talk - to each other or just to you?  A great strategy to structure classroom is discussion is "Math Talk".  

5.  Enjoy your job and communicate that enjoyment to your students.  
Nobody wants to be around someone who is miserable and wishing they were somewhere else or doing something else.  I'm so sorry to be the one to say it, but its true.  If you hate what you are teaching or where you are teaching it, the students will know it and they feel rejected.  This attitude also bleeds through into your ability to teach you students and to help them to feel connected.  On the flip side, if you are pleasant and genuinely want to be doing what you are doing, it draws the students in and helps to make a connection and communicate that learning can be enjoyable.  The more you want to be there, the more your students will too!

I realize that there is a great deal more that goes into effective classroom management, but these are five things that I have found work for most anyone!  Do you have any other strategies that you have found work well?


Thursday, July 2, 2015

Money Saving Tips Part Two!

In my first post in this series (check it out here if you missed it) I shared a few of my favorite ways to
save money.  In this post I wanted to share a few more!

1)  Making TeachersPayTeachers work for you!  I know that many of you who follow this blog are shoppers on TpT and have found many fantastic products from all of the wonderful teacher-authors on there.  But did you know that you get credits if you go back and leave feedback?  Anytime you leave feedback on a paid product you get a credit per dollar. On their site, TpT states "We will round up for you, too! If you provide fair feedback on a $4.75 item, you will earn 5 credits. Every 100 Credits is worth $5 that you can apply towards future TpT purchases, but there is no need to wait until you have 100 to redeem them. 50 credits is worth $2.50, for example.".  Then once you go to buy something else...you can apply the credits to get money off :)  Just like my favorite thing - coupons.  

2) Speaking of coupons...Use them, as often as possible!  I am not an extreme couponer by any means, but I love to use them!  There are so many great sites out there to find coupons such as retailmenot or coupons.com but did you know that many stores offer coupons right on their site?  For example, if you got to target.com and scroll to the bottom you will see right in the middle ways to save!
All of the coupons can be stacked in with store savings and their cartwheel app too!  

3)  Investing in quality instead of quantity.  While I love a good deal, I also have come to realize that a deal only serves me well if what I am getting is going to last me a while. Early one I would buy things that were on super low clearance prices and then realize why they were so low when the fell apart a few months later!  I learned that there were certain things (like totes, binders, etc.) that I spent a little more upfront then I would save money down the road because I wouldn't have to buy it twice.  For that reasons I started buying boxes like this instead of milk crates.  They last longer, they come with lids and don't have holes that things will fall out of.  
File Storage Box

I use boxes like these to store extra copies of papers, hanging folders full of colored copy paper, hanging folders of task cards, etc.  Best of all, they are stackable!  

Follow me for more tips soon! :)

Monday, June 29, 2015

Money Saving Tips, part one!

As summer starts I have a list of things that I want to accomplish - including figuring out how sleep past the 5 am that my body got trained to all school year!  One of the biggest issues that teachers have is how to provide for all of their classroom needs on a usually a limited or non-existent classroom budget!   So I thought that throughout the summer I would share some of my favorite money saving tips!

1)  How to maximize card stock and colored paper.  I was in Target recently shopping for card stock to print my newest Bingo Game on.  It features two different types of cards, 30 each of two types.  As I was standing there pricing out card stock I had lightbulb moment!  I realized that if I printed my Bingo Cards with one type of card on each side I would only  need 30 pieces instead of 60.  Big Savings!  Especially if I laminated them afterward to save them for multiple years of use!  
Surface Area and Volume Bingo

2)  Saving on consumable classroom supplies.  I go through glue sticks, colored pencils, erasers and pencils like they are candy throughout the school year!  After a few years of spending almost my entire classroom budget on just these things I needed to find a better solution.  I realized that usually about 2 months before school starts the office supply stores start offering pencil, nickle and quarter sales with each weekly ad.  For example Office Max will have 12 packs of pencils for a penny.  While there is usually a limit per transaction, I will either take my husband with me or go a few times in a week until I get what I need.  Here is sample add from last year so you can see what I mean!  

3)  How to test it out before you laminate it permanently!  Those things that I keep permanently I like to laminate to make them last.  Sometimes, however, I'm not sure if it is going to work the way that I want but I also don't want to print it twice.  My solution?  Page Protectors!  They work great for full page sheets so that you can write on them with dry erase markers and test them out before taking the final step of lamination (or a way to skip it totally!).  If you are think yes, but what about task cards that are smaller...well I found these that work perfectly!  They are for 4x6 recipe cards (they come in 3x5 too) but work great for task cards.  

 I'll be back later this summer with more tips!  I hope you found these useful! :)

Thursday, March 5, 2015

Graphic Organizers: The What, Why and How of Implementation


Picture this:  You are a junior in high school with 6 classes a day, a part-time job, you have a boyfriend or girlfriend and you are vice-president of the student council.  Additionally, you have the demands of text messages going off on your phone every four minutes and you really need to sleep at some point.  You walk into your 1st hour math class and your teacher casually reminds you that you have a test, tomorrow, on an entire unit of material that was 9 sections long.  You have to work tonight and have a paper due for Government in two days!  Panicking yet?  I know that I would be!  


All hope is not lost, however, as your teacher starts handing out a set of graphic organizers that she made ahead of time.  These handy little sets of paper include flowcharts, tables, Venn Diagrams and other organizational tools designed to help you summarize the most important parts of the unit.  You are start to breath a (small) sigh of relief because at least now you have a place to start and maybe, just maybe, you can still work and study in order to pass the test!

For me, I wish graphic organizers has been used, publicized (as I'm sure they must have existed - we just never saw them) and/or encouraged as a study and organizational tool.  I had (and still at times have) issues retaining concepts for longer periods of time, partially because I was busy and partially because of how my brain worked.  Given that it was 20+ years ago when I was in high school and we didn't have the high stakes standardized testing pressures that students have today, I probably got off easy.


As a teacher at the secondary level, I see what my students have to deal with.  It goes beyond the scenario I outlined above to also include studying for the state testing, taking care of younger brothers and sisters, applying for colleges and scholarships and so much more.  As a result, I have spent time trying to find a way to help my students be able to better visualize that material, the connections between topics and to help them retain the knowledge beyond a unit test.  I want them to develop study skills that will aid them not only in finishing high school but to also help them succeed in college and the workforce.  I see graphic organizers as a way to do that for 4 reasons.


Quadrilaterals
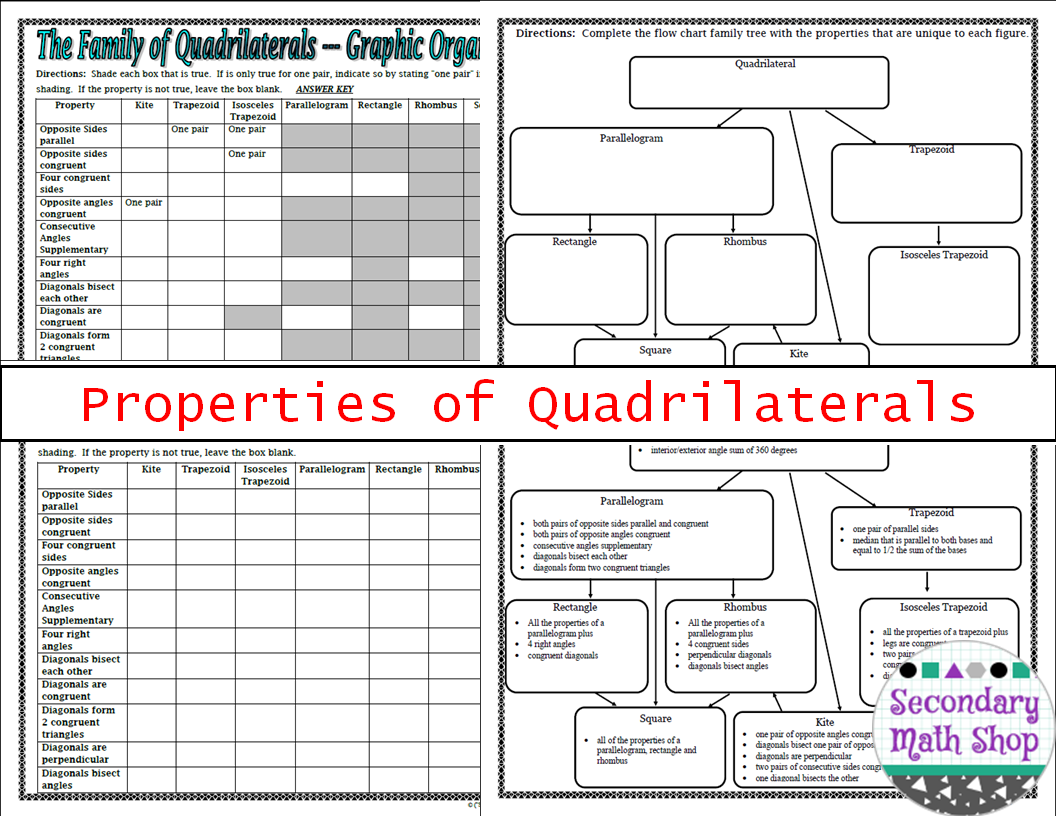
1)  Graphic organizers are a visual way to "see" relationships.  In math so many topics are interrelated but sometimes the relationship can be difficult to see.  Through the use of bubbles, rectangles and arrows on a graphic organizer you can see how concepts effect each other.  For example, I teach that quadrilaterals form a family tree and teach it in flow chart format.  We create a graphic organizer together to show how the properties are "passed down" from one "generation" to the next.  My students really start to respond and "get it" once they can see how the quadrilaterals  are interrelated.


2)  Graphic organizers help students to organize the information in such a way as to highlight and summarize the important concepts.  As much as I would love to believe that every word that comes out of my mouth when I am teaching a lesson is pure gold, this is not true.  Realistically some of it is just filler, examples or ways of explaining a concept multiple ways to help students understand.  It is not always the meat of a topic but the sides dishes as well!  Graphic organizers help students to cut through the extra information to get to the foundational parts.  For example, when I teach my unit on Right Triangles and Trigonometry, I give my students a set of graphic organizers at the beginning of the unit that they can fill-in as we go along.  These organizers are designed for students to include all of the formulas and an example of solving or applying that formula since this is truly the crucial part of the unit.

3)  Graphic organizers appeal to visual learners.  In addition to helping most students see the relationships among topics, graphic organizers can help some students just simply see that information.  For some students, notes are just words on paper that they need to try to decode, often without success.  Graphic organizers can help them to make sense of those ideas and translate the information into a medium that speaks to them.  For example, when we do our unit on Circles, a unit that is extremely visual, my students who learn best visually are known to color coat the parts and constantly refer back to the organizers as they solve problems because they really help them to see, understand and be able to apply the concepts.


Circles
4)  Graphic organizers are a tool that students can use to hold on to information long term.  If students fill-out the graphic organizers as each unit progresses, then at the end of the semester, they have a great study tool to help them prepare for the final exam.  Instead of having to sort through notebooks full of notes or folders full of handouts, they have the most crucial information from the entire semester condensed down to a more manageable number of pages.  If the student is truly organized, and can really hold on to the papers long term, they can carry them through prepping for the state testing, entrance exams for college or even on their jobs.  

Whatever the reason or method, the course you teach or the level you teach at, I highly recommend implementing graphic organizers into your classes.  Not only will your students benefit, but you will too!  I have other graphic organizers than the ones listed, please click here to see them all!

Friday, January 9, 2015

Quick Reference Sheets - A Perfect Fit for Interactive Notebooks and More!

Geometry (and math in general) is full of theorems, diagrams, formulas, calculations and so many more topic specific things to remember that students often suffer from brain overload.  Throughout my years of teaching math at the secondary level I have seen this happen on multiple occasions and when it happens, well the results are just not pretty.  The students begin to get frustrated trying to keep things straight, they act out or
Quick Ref
worse, they give up and shut down.  I am a big proponent of graphic organizers (coming soon in a future blog post!) but depending on the topic they can sometimes get lengthier than I would really like them to become.


Quick Ref
The need for something to help students really came to a head when we started talking about right triangle and trigonometry, specially the special right triangles formulas!  To overcome both the student shutting down and the length issues, I started thinking about how I remember things.  I mean, even though I'm a math teacher, I can't keep everything in my head at all times! :)  I realized that I often create "cheat sheets" for a lack of a better thing to call them.  These sheets usually consist of formulas, sketches and possibly shortcuts depending on what I'm trying to remember.  When I sat down to transfer my cheat sheets to something more students friendly, I ended up with something that was a cross between a graphic organizer and a formula list.

Each one ended up containing diagrams as well as the formulas that corresponded!  I decided that I didn't want to just give them everything thought.  I am a strong believer in the fact that when a student writes things down on their, they remember the information better.  As a result, I ended up creating two versions.

The first version has everything filled in as an answer key and as an accommodation for students with IEP's/504s.  This version also works great to leave at a station for an aide during a station review. 

Freebie!!!
Additionally, I have sent them home to parents to give them an overview of the unit that we are studying as well as putting them in my own unit plans.

The second version has blanks for students to fill in of the important information. 
I found that this works perfect for many things.  If they are printed two to a sheet, students can put them in an interactive notebook.  I have also used them as a review for a quiz or test and as a catch-up tool for absent students.

Bundle
So far I have created six:  Circles, Transformations, Area, Surface Area and Volume, Quadrilaterals and Right Triangles/Trigonometry.  This last one is my newest freebie in my TeachersPayTeachers store!  Please
check it out and let me know what you think. I have also bundle all six of my Quick Reference Sheets in a money-saving bundle!  I have more planned to cover other units of Geometry and eventually I might branch out and make some for algebra! 

Sunday, January 4, 2015

New Year, New Resolution to Get Organized

At the beginning of the school year I went through and spent time getting myself organized both as a teacher and in my classroom.  As the year has gone on, however, I have found certain things lacking.  Namely the cohesiveness of the walls, boards, turn-in, pick-up and supply bins.  They are just a mess and it drives me bonkers!  I have tried different ways to overcome this mess including sticker labels, folders and other random methods.  But for me, since it is handwritten, it still looks sloppy.  

As a result, I turned to my favorite teacher store first - Lakeshore Learning - to see if they had anything that would meet me labeling needs!  I found some great little plaques/name tags that I could laminate and write on with dry erase markers.  They are really nice and cohesive looking...but after getting them home and trying them out, I realized that they still didn't look...well professional enough for a high school classroom.  

 
Vintage Digital
So I did what I have done for a while now - I made them myself!  I downloaded some fantastic retro and vintage digital papers from Stacey Lloyd on TeachersPayTeachers and got to work!  I used the papers as a background in PowerPoint, added some frames, did some other coloring, manipulating and modifying and had a template.  I then started thinking about everything I needed to label in my room and created professional looking labels for everything in my room!  I even created labels for my group numbers so I don't need to recreate them every I put students in groups. To make them functional and long lasting I am going to print them on card stock and laminate them.  

Starburst
After a couple of days of staring at them (since I made them over winter break when I was still over a week from getting back in my classroom) I decided that if they would benefit me, then maybe they would benefit other secondary math teachers too!  So I made four more sets with different backgrounds and posted them in my TeachersPayTeachers Store.  I also included a powerpoint file so that teachers can make their own labels and change the phrasing if something that I labeled isn't what they call it!  The labels come in Starburst, Circles, Diamonds (a black and white design for those without color printers), Stripes and Circles and Stars (this prints really well in gray scale if you are color ink challenged!). 

What is your favorite way to get  organized?

***Thank you to Stacey Lloyd for the fantastic background for my blog cover slide***

Wednesday, August 20, 2014

TPT Boost Sale - Only a few hours to go!

Today is the last Back To School Sale for the school year!  I hope everyone is able to stock up and save!  Anything and Everything in my store is 20% off and TPT kicks in another 10% to raise your total savings to 28%!!!!  I have back to school secondary binders, word wall posters, task cards and notes to start off your first unit of Geometry!  So stock up and save! :)

Thank you to Glitter Meets Glue Designs for the awesome graphic!!!

Wednesday, August 13, 2014

Embracing what you have in your classroom

My classroom is the typical one with cinder block walls, white/chalkboards, window, etc.  I have one exception though - I lack bulletin boards.  For whatever reason, when they put my room together they forgot to put up any bulletin boards.  After many years of trying to secure them, I have decided to embrace what I have instead of wishing for what I don't.

In that vein I have went on a quest to find something that would stick to whiteboard to dress it up without destroying the ability to write on it.  I knew that tape, ticky-tack and other adhesives would not do the trick, I needed something magnetic...and I found it!!!  I found magnetic whiteboard border!  It comes in packages of 12 strips that are 2 feet long each and runs about $10 a package.  A little pricey but since it won't rip, definitely worth it in my opinion.  While I found mine at a local teacher store (Lakeshore Learning) they do not sell borders online, so I did some research and you can purchase them on amazon as well.  Here is one link: Magna Borders


Mounting Tabs
With my "dressing up my whiteboards" problem solved, I turned my attention to how I can get anything to stay on my painted cinderblock walls.  I have all of these great Geometry posters that I have made but need a way to not have to rehang them every Monday morning. After trying it all - tacky-tape, duct tape, double sided tape, hot glue - I finally found something that not only works, but also doesn't hurt the posters and is completely removable!  They are called "Removable Mounting Tabs". They stick to the wall, they stick to the poster but do not harm either and remove easily.  Again I found them at the local teacher store (click on the picture to be taken to them online) for a reasonable price!

Sometimes teaching is about pushing for more, especially with our students and their learning potential, but sometimes it is about taking what you have and making it look amazing!  That is what I have chosen to do!  :)

Saturday, August 2, 2014

What Do Teachers Love Even More Than New School Supplies? Saving Money On Them Of Course!

It's that wonderful time of year when teachers are shopping for all of their back to school supplies.  We find the pencils, pens, rulers, glue sticks and dozens of more supplies in our local stores at (hopefully) great prices!  But if you are anything like me, you find that the teaching resources at your local teacher supply shop aren't quite meeting your needs.  You might find yourself thinking "I need something on just _________, not with ___________ mixed in too"!  That is how I discovered TeachersPayTeachers and over time, I migrated from buyer to buyer and seller and the SecondaryMathShop was born!

My shop specializes in primarily Geometry resources with some Algebra and Trigonometry mixed in.  I have notes, homework, posters, graphic organizers, binders and so much more.  Next week - August 4th and 5th - is the annual Back To School sale one TPT.  You will be able to save not only 20% on everything in my store (money saving bundles included!) but TPT is offering an extra 10% on top of all sale prices.

So please, shop away.  Visit the SecondaryMathShop if time allows and get your year started off right and save money doing it! **Thank you to CampingTeacher for the fantastic artwork on this post!!!**
Related Posts Plugin for WordPress, Blogger...